Tutorial: how to make an installer for your Excel workbook
XLS Padlock lets you compile your Excel workbooks as secure application EXE files. Moreover, users who work with these compiled workbooks may be allowed to save changes made to the workbook. These changes are stored in encrypted save files whose extension is XLSC by default. Only the compiled workbook can reopen these encrypted save files.
In this tutorial, we will show how to use a custom extension for encrypted save files, how to create an installer for a compiled workbook and how to configure the installer to associate the custom extension with the compiled workbook EXE file. The goal is that end users can double-click on a save file to immediately open it in Excel without any prompt.
Pre-requisite: Paquet Builder, an easy-to-use and powerful installer maker software.

1. First we choose which extension we want for our save files. For this tutorial, we’ll choose MBX
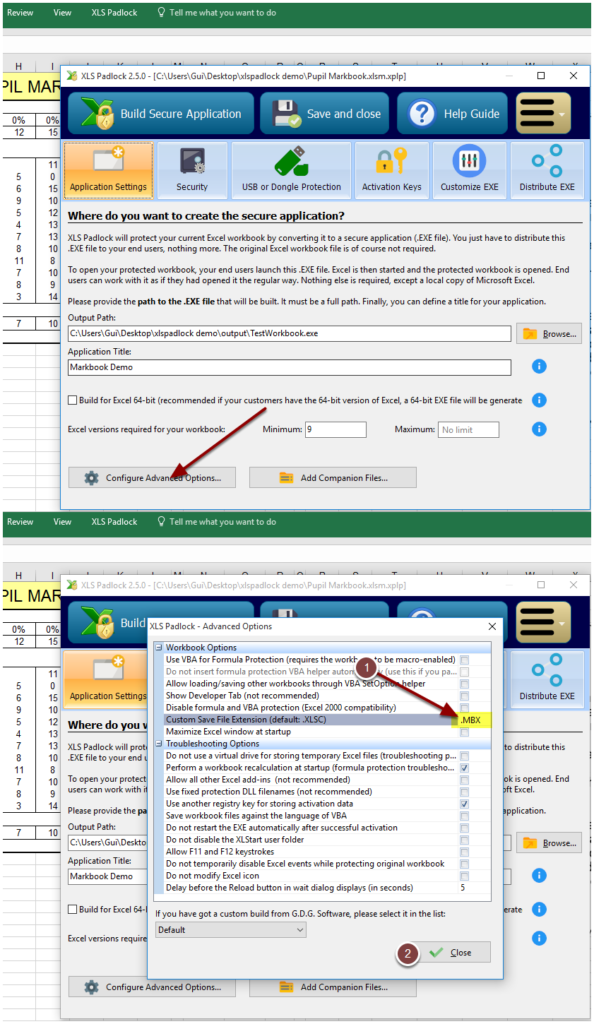
Enter .MBX in the appropriate field as shown above (or any extension you want to use for your own workbook).
2. Create the compiled workbook to take account of changes
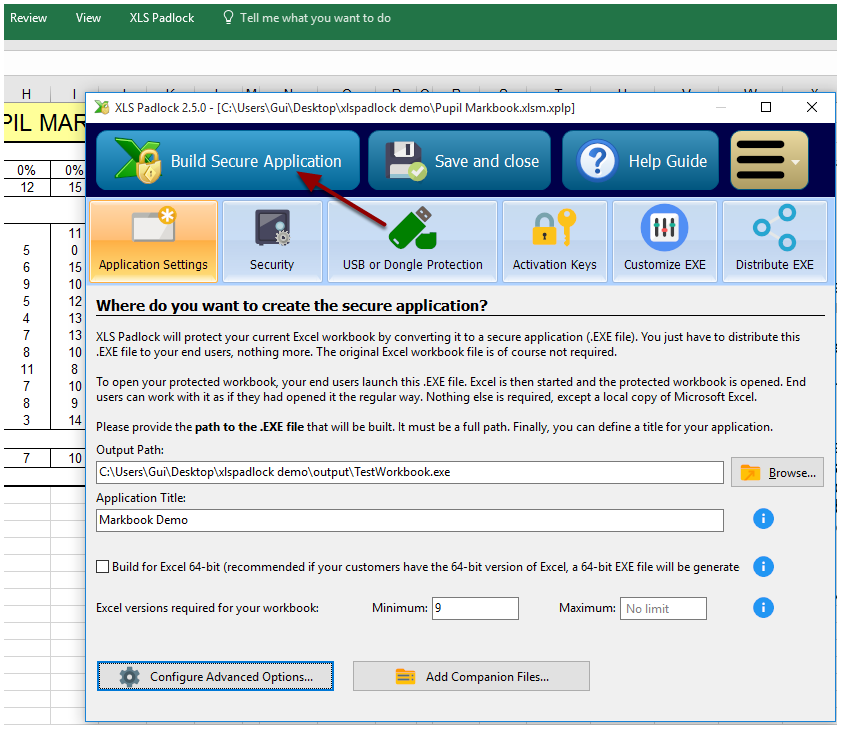
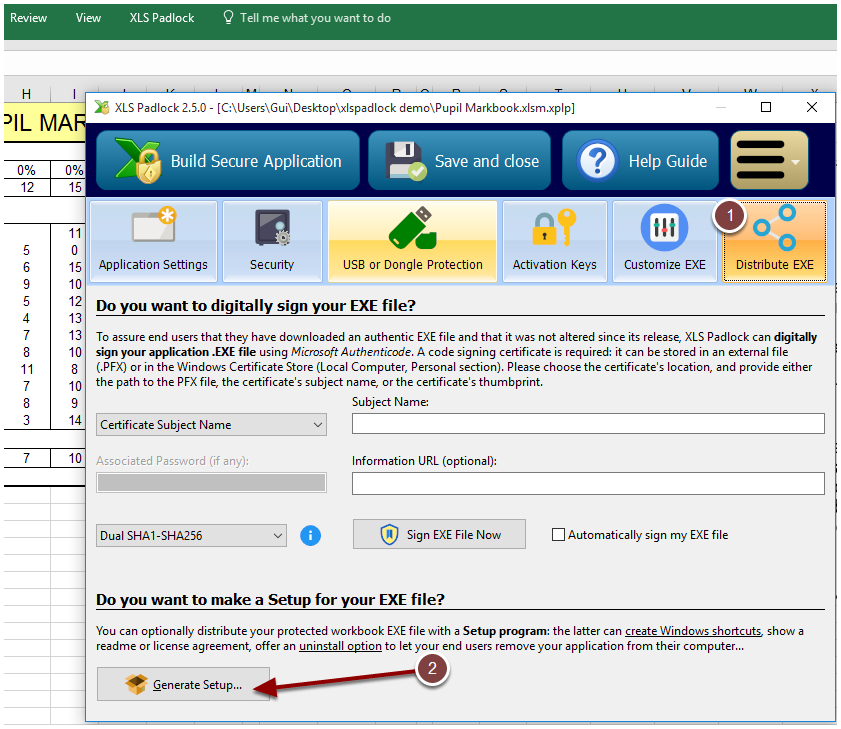
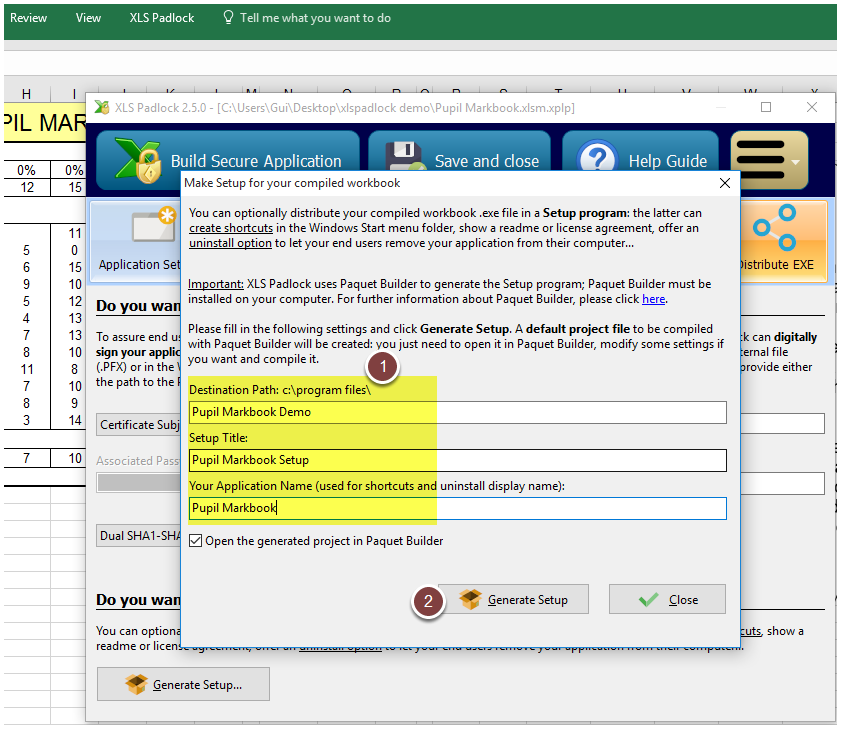
3. Click Distribute EXE and then Generate Setup
4. Fill in all the fields with information about your workbook then press Generate Setup
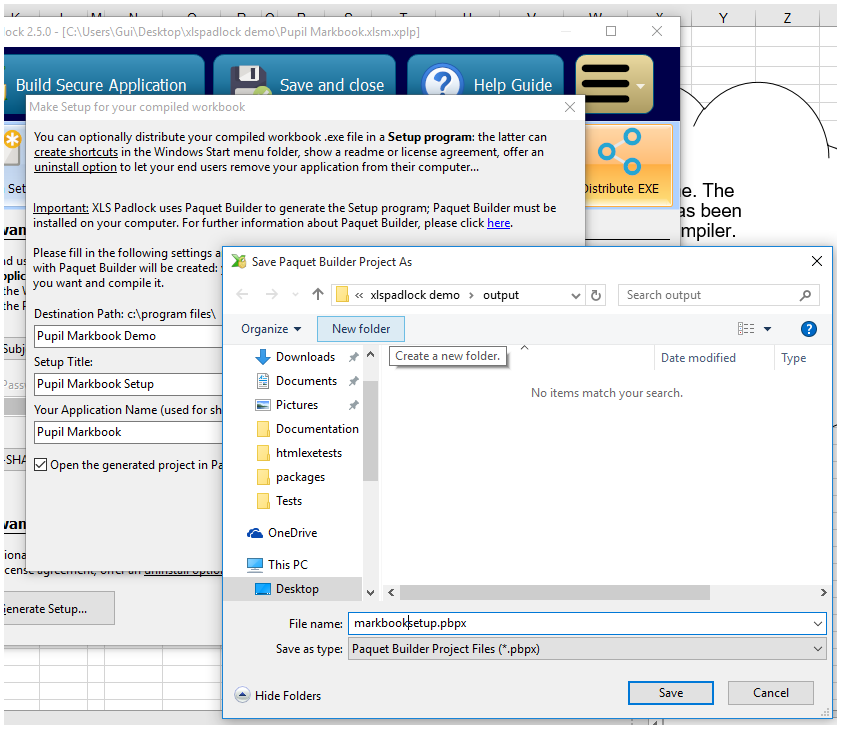
5. Choose the filename for the installer project file and click Save
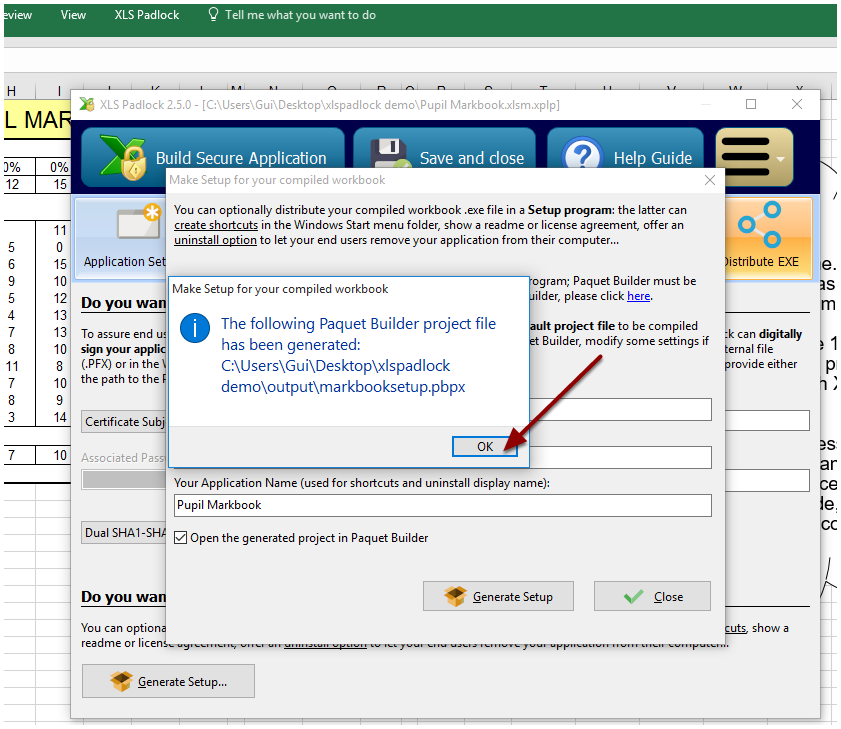
6. The installer project file is created. Click OK and the installer creator software “Paquet Builder” is started.
Now, any of your end users who install the compiled workbooks thanks to our new installer will be able to load encrypted save files and modify them. Of course, you should have allowed this behavior in XLS Padlock…
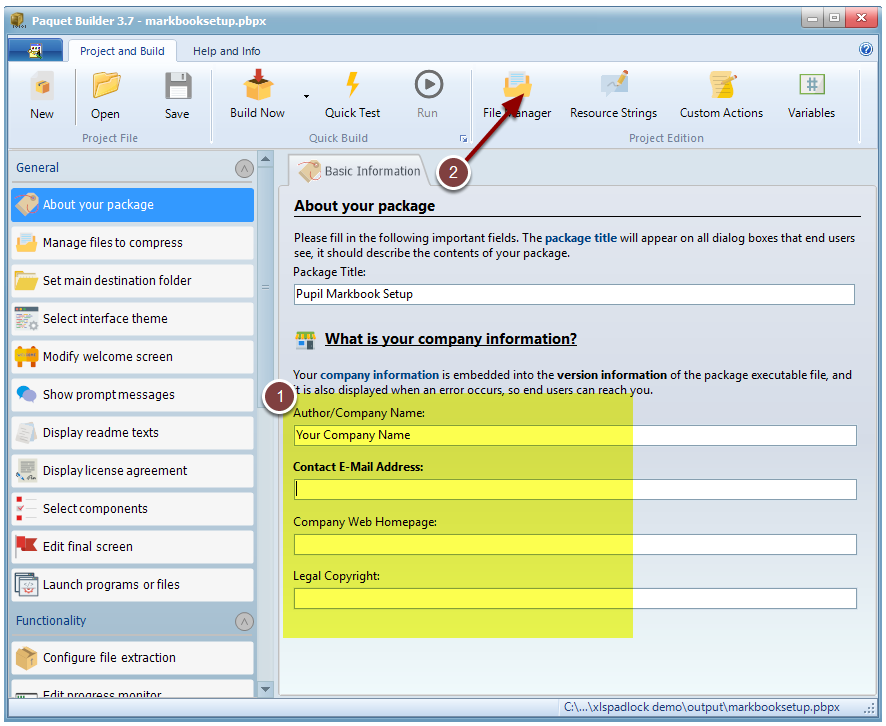
7. Paquet Builder is started. Fill in all fields of the company information, then click File Manager:
8. As you can see, the compiled workbook TestWorkbook.exe is listed.
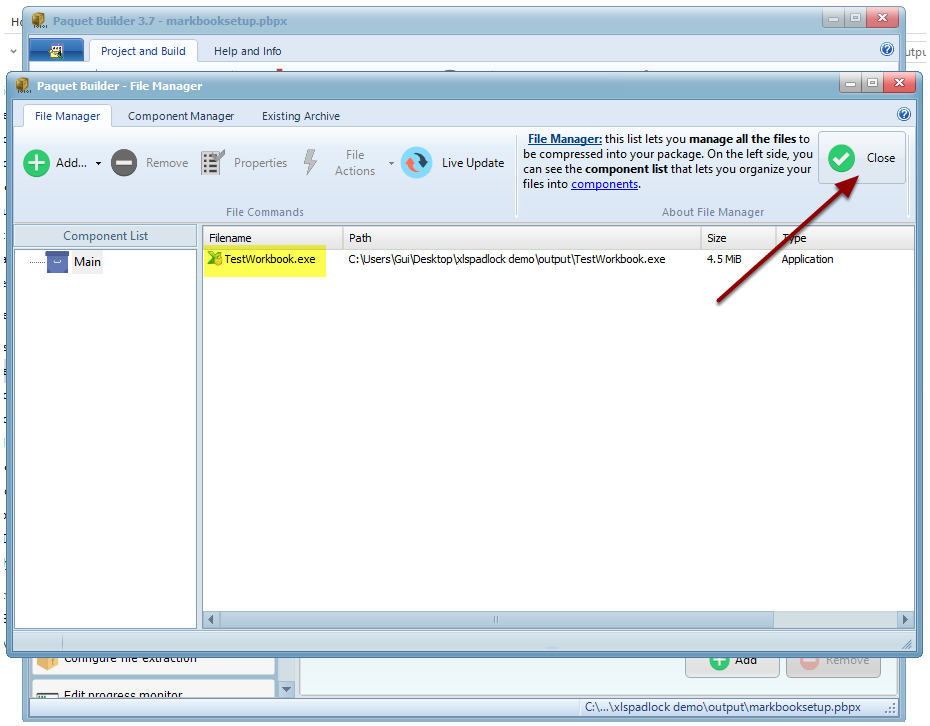
This indicates that the compiled workbook will be compressed and installed by the installer to the default destination folder. Let’s see what is the default destination folder. Close the File Manager.
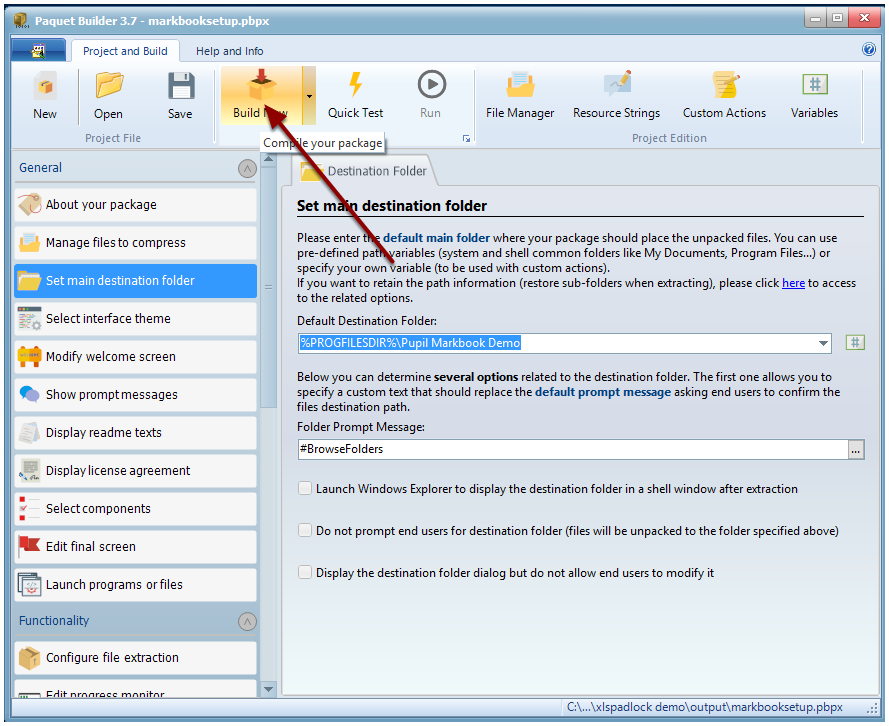
9. Verify the destination folder and modify it if you don’t want the default one.

%PROGFILESDIR% indicates that the compiled workbook will be copied to the standard Program Files directory. So %PROGFILESDIR%\Pupil Markbook Demo means that the installation folder will be C:\Program Files (x86)\Pupil Markbook Demo. Generally on Windows, applications (such as compiled workbooks) must be stored in the Program Files directory.
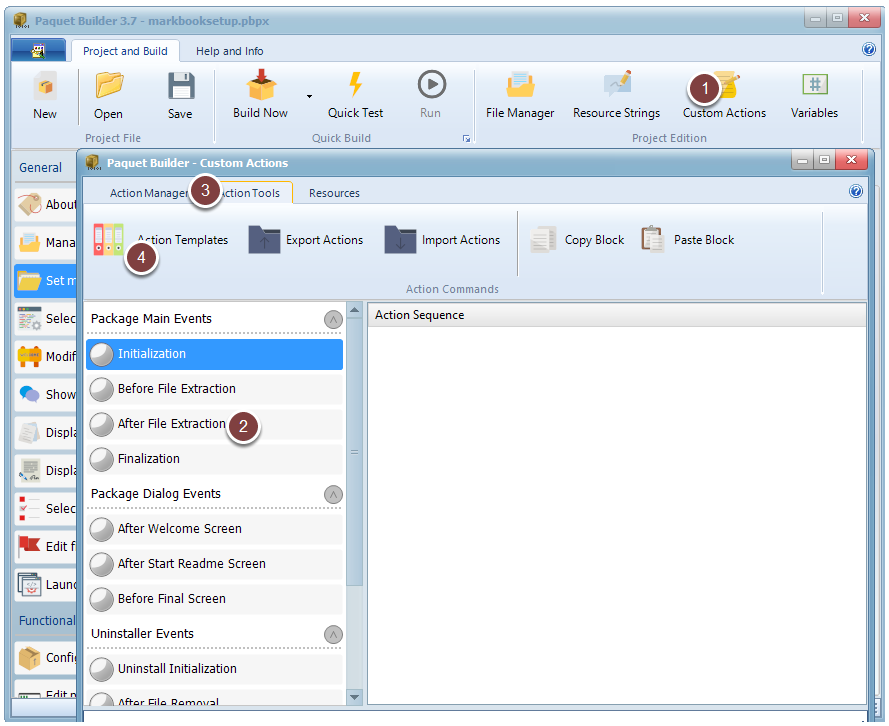
10. Now we’ll configure the installer to create the file association. Go to Custom Actions, select “After File Extraction” event and click Action Templates
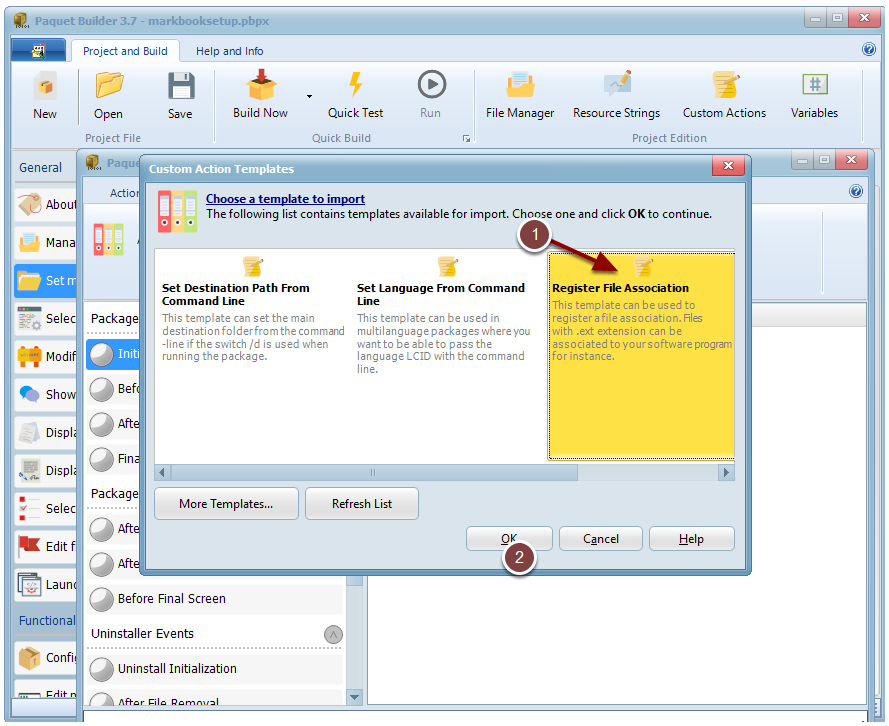
11. Select “Register File Association” and click OK
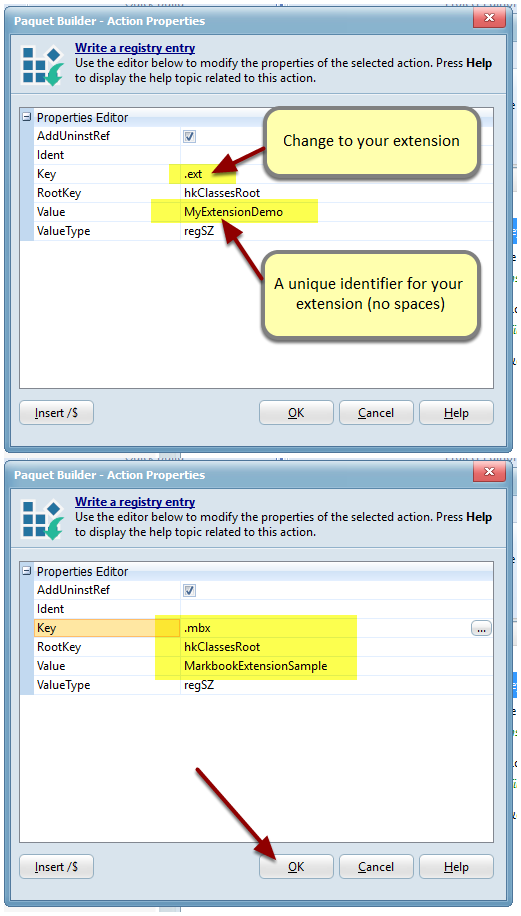
12. Custom actions are created to register the file association. We need to edit them to create the correct association. First, we need to change all .ext to .mbx (the extension we chose at the start)
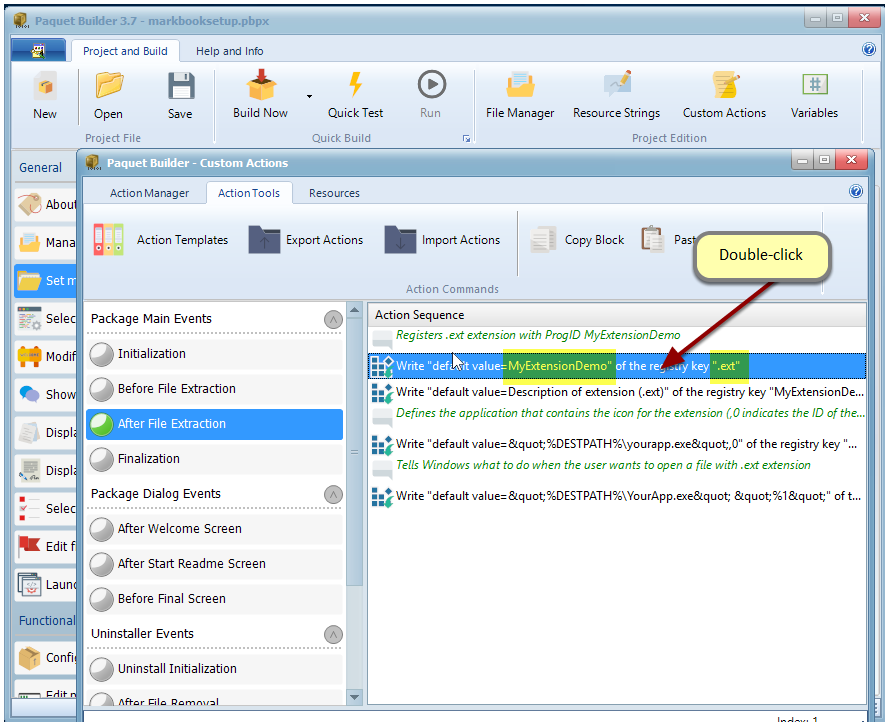
13. Edit the properties of the first action: two entries must be modified according to the description below
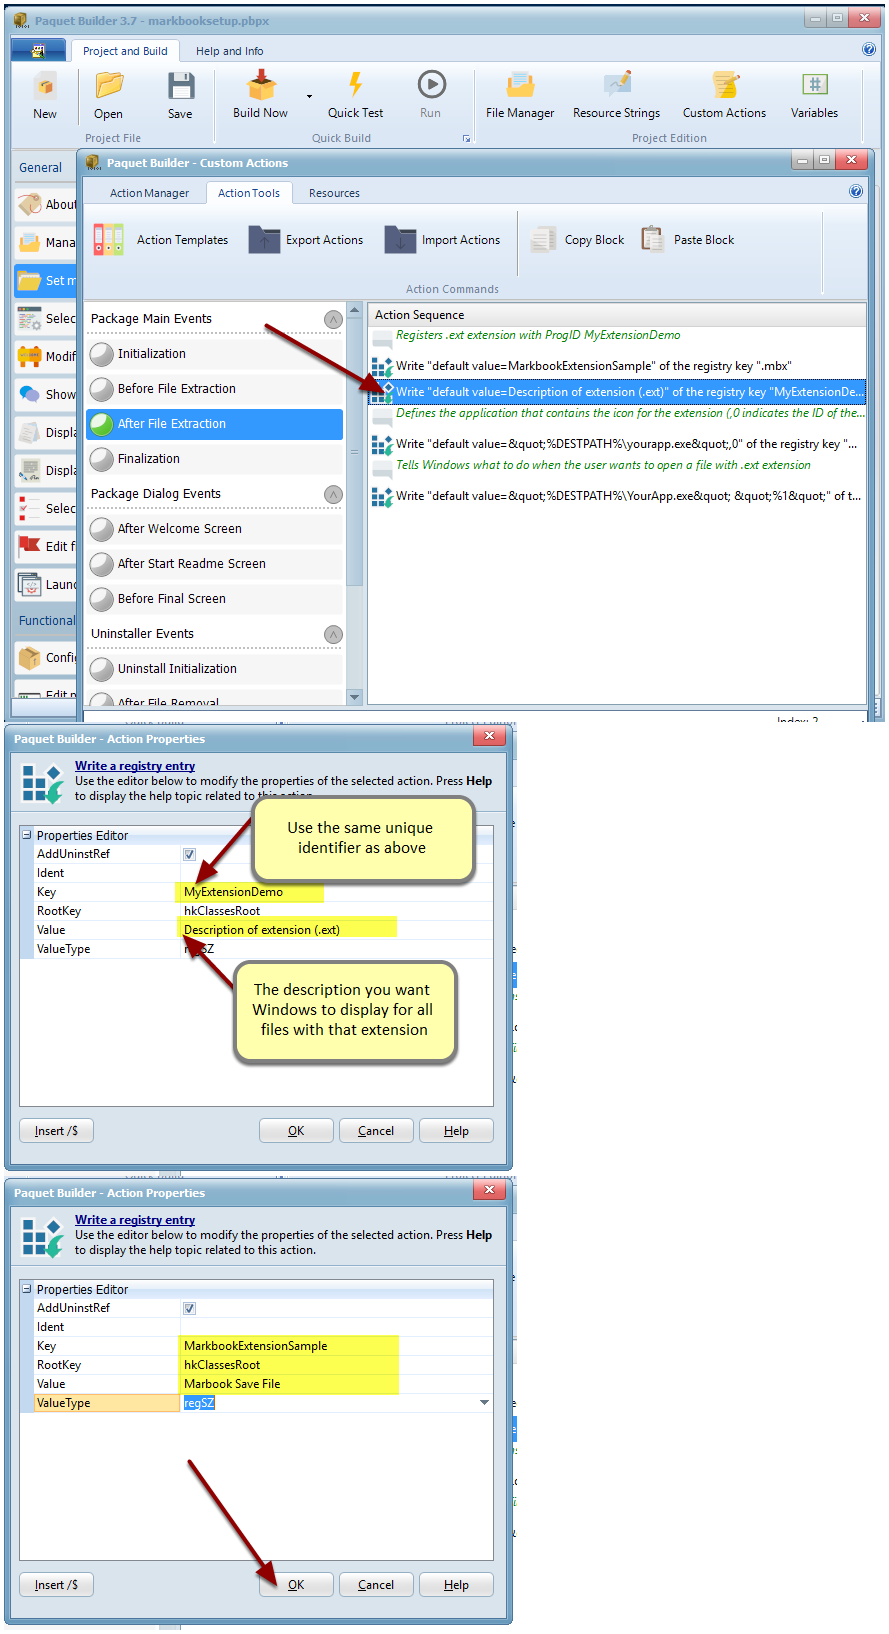
14. Double-click on the second action which sets the file description:
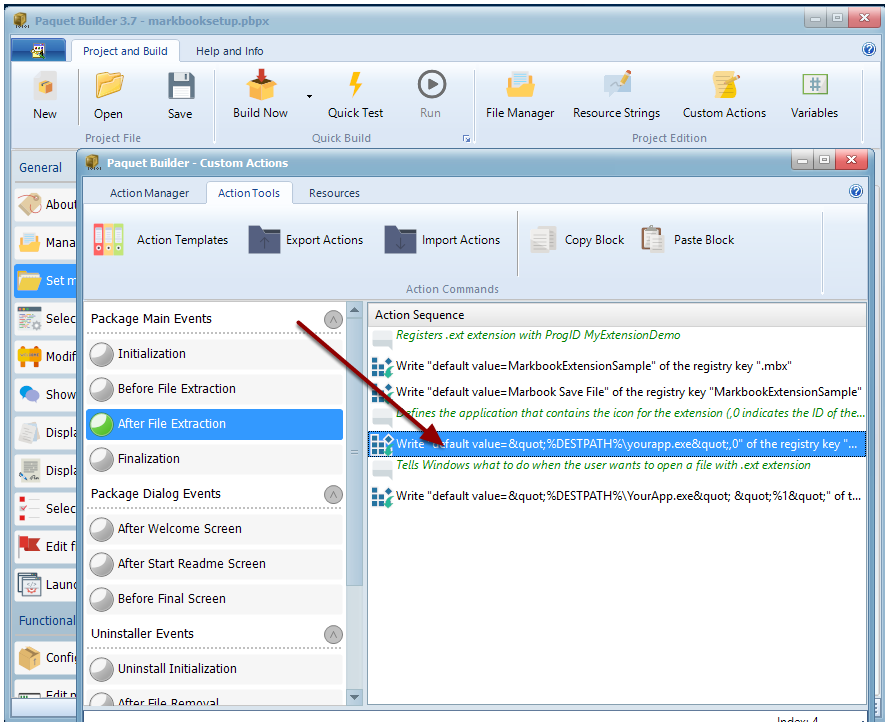
15. Edit the third-action by double-clicking it
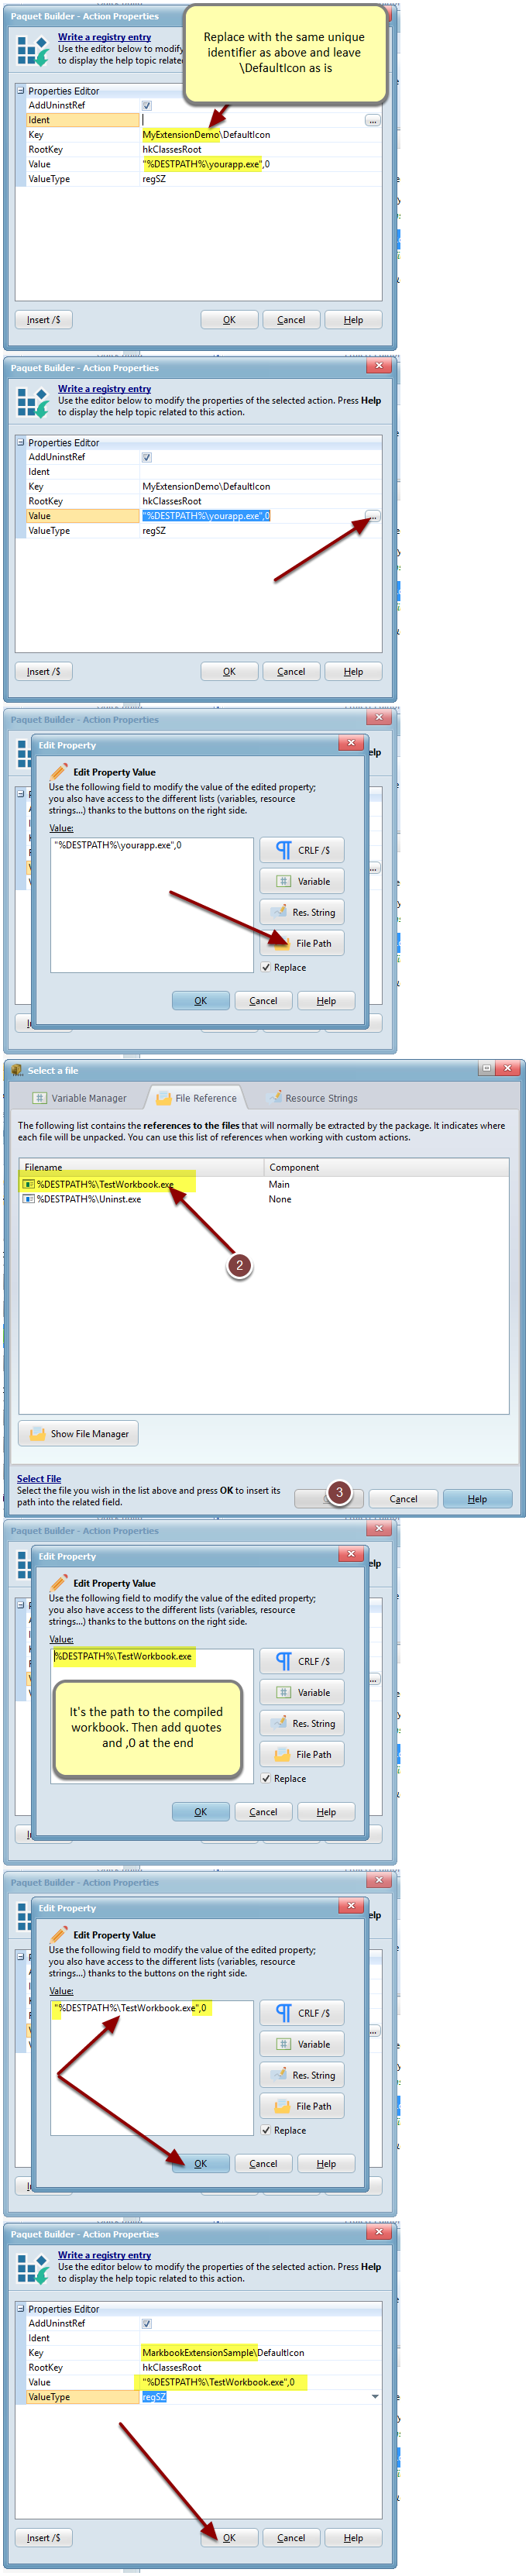
16. Configure the action thanks to instructions shown on the screenshot
17. Finally, edit the last action in the same way
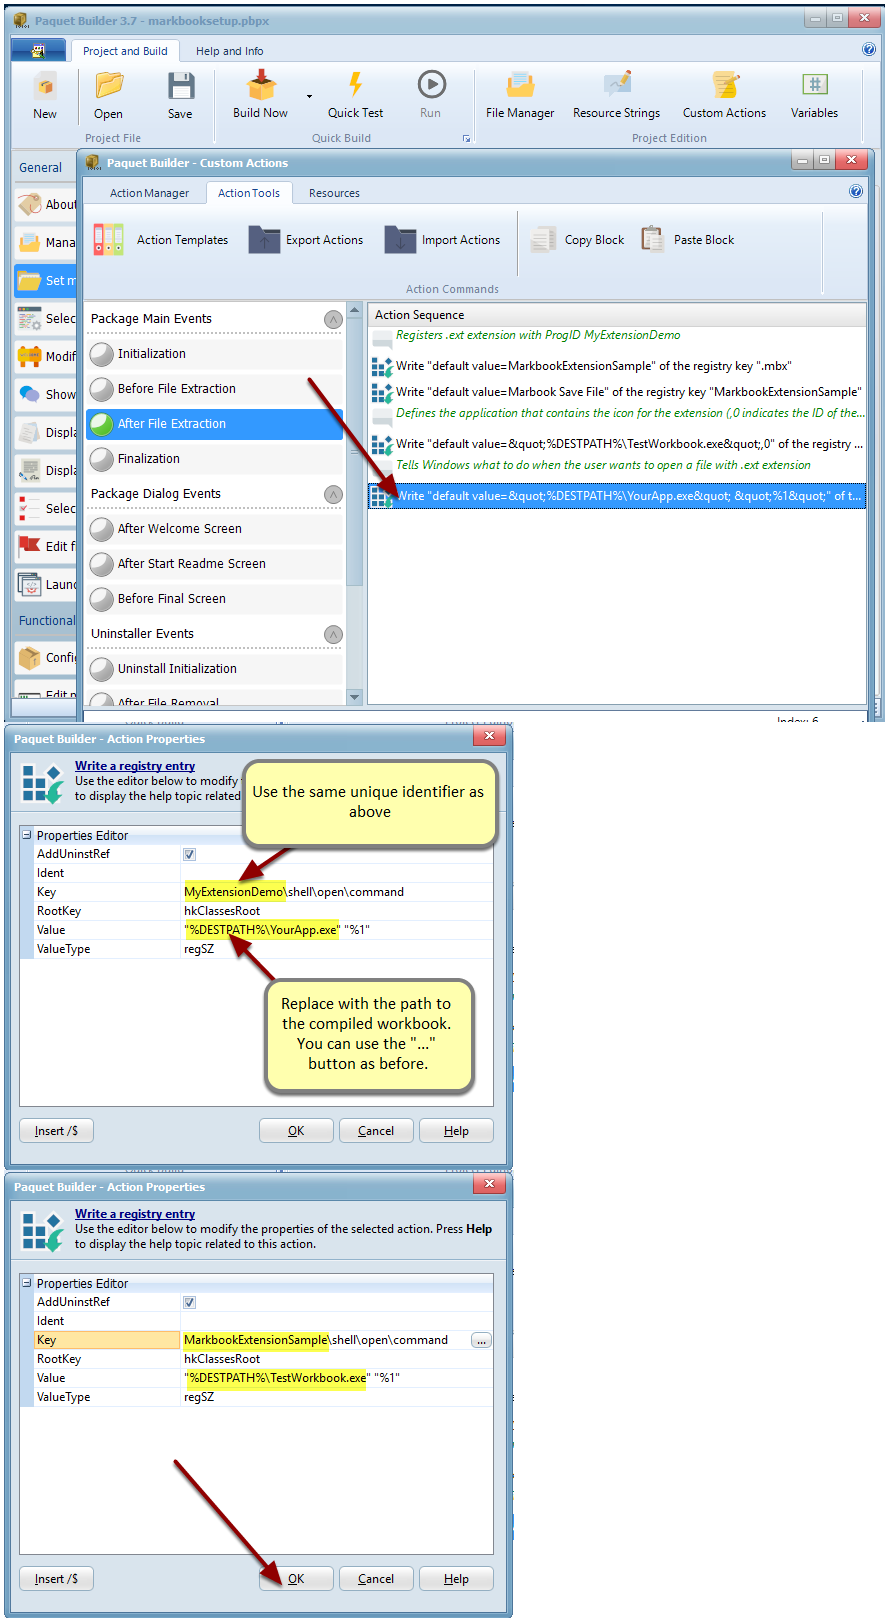
Do not touch other characters when replacing values. For instance, the final “%1” is mandatory.
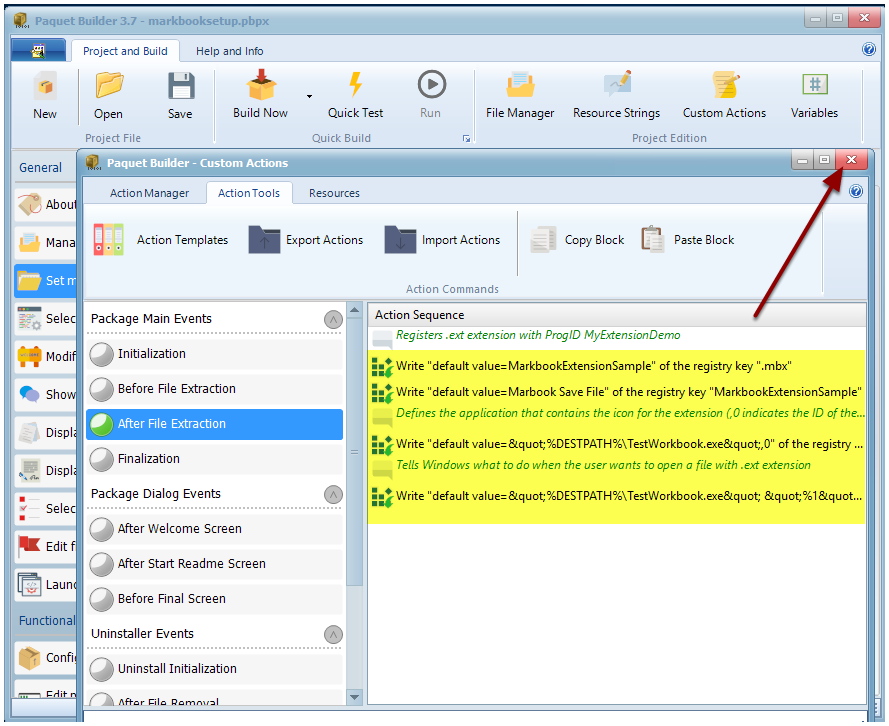
18. Close the Custom Action editor
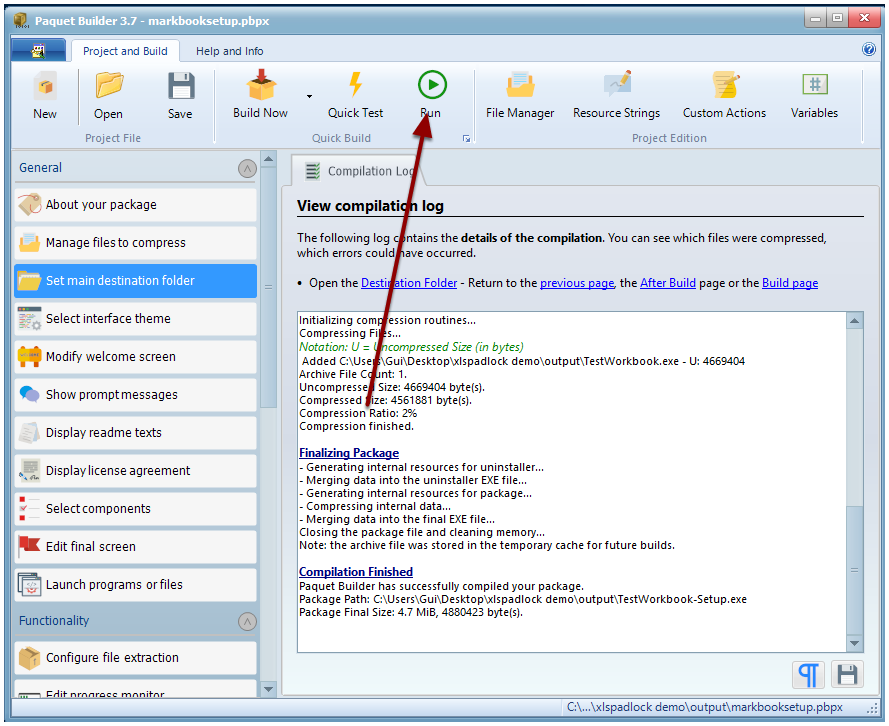
19. Create the installer thanks to “Build Now”
20. Test your new installer
21. You are prompted for elevated rights which is normal because you are running an installer to set up a new application (the compiled workbook)
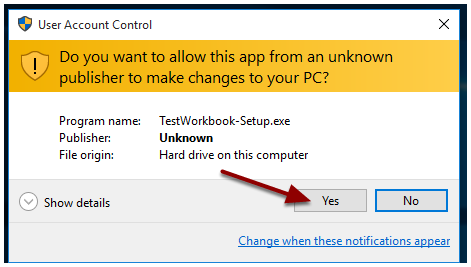
Unknown publisher is displayed because we did not sign the package. Signing is possible of course: refer to the documentation of Paquet Builder.
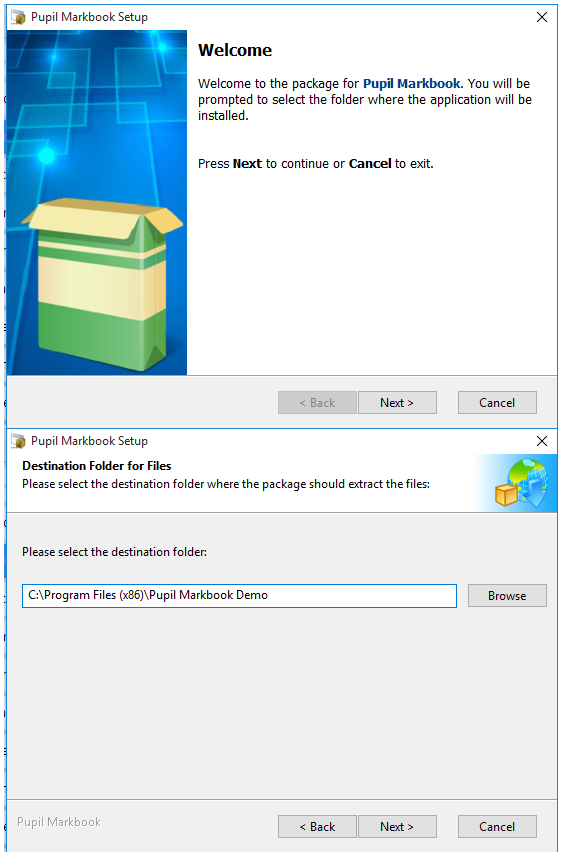
22. Follow instructions of the installer. After installation, a shortcut to the compiled workbook is created on the desktop.
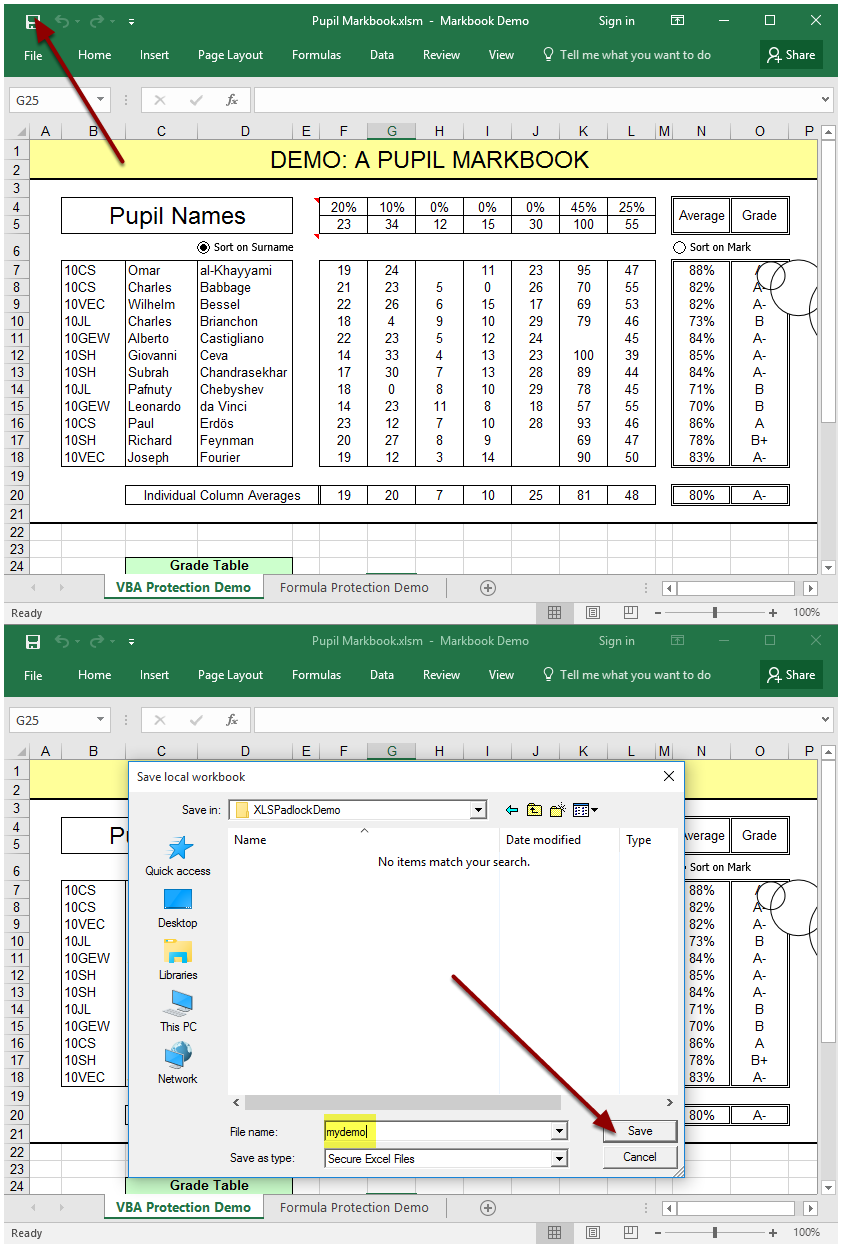
23. The secure workbook is displayed in Excel. Just click Save to create an encrypted save file and choose its filename
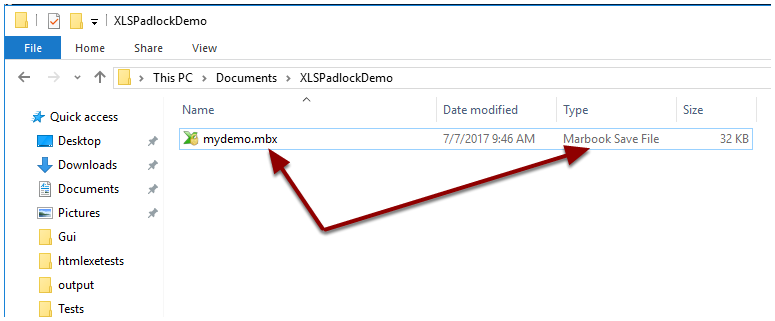
24. Close Excel and navigate to the folder where you saved. As you can see, the save file has our custom extension .MBX and the Type is what we defined previously “Markbook Save File”
25. Double-click on the save file: Excel is automatically started and the save file loaded. No need to use the compiled workbook’s shortcut.
Now, any of your end users who install the compiled workbooks thanks to our new installer will be able to load encrypted save files and modify them. Of course, you should have allowed this behavior in XLS Padlock…
This is the end of this tutorial.